Learn how to make LIQUID WATERCOLOUR PAINT WITH your dried up markers. It’s fun and easy and can save you a fortune if you have kids who love to paint.
We love making our own paint here in my daycare. It’s a great way to save money, and making the paint is always a fun activity in itself. I’m thrilled to share this homemade liquid watercolour recipe with you today. All you need are old, dried out markers to make it.
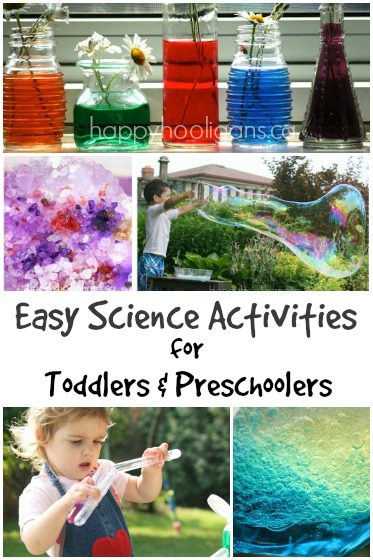
Liquid watercolours are amazing. We use them a lot here in my home daycare. They’re vibrant, versatile, beautiful, and fun to use.
Liquid watercolours are also expensive to buy – especially when you use them frequently in a daycare or classroom for art projects and colourful science activities.
Good news… I’ve discovered a way to make your own homemade liquid watercolours which are perfect for preschool arts and crafts.
Lots of ink left in them!
You know those markers that the kids have left the tops off of, or that they’ve used so often there’s no ink left in them, or the ones that have just dried up over time?
Surprise… There’s actually a lot of ink left in them.
Even the most worn-out, dried up, marker has a ton of ink left in it. And you can easily extract that ink and turn it into colourful paint for your kids.
Easy but it takes time
The process is easy. It does take a bit of time though, so patience is required, but hey, those markers were just going in the trash anyway, right? Waiting a few days while your markers turn into paint isn’t really a biggie.
Let me show you how to do it!
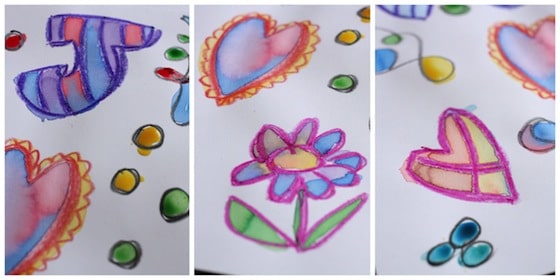
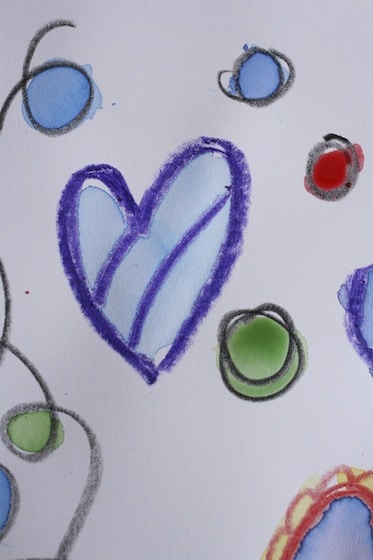
In these above pictures, the outlining was done in crayon. All other colour is the liquid watercolors.
Note: Because I like the intensity of store-bought Liquid Watercolor Paint (affiliate link, I put some extra effort into this process. You don’t have to put quite as much effort in, but I feel that it really paid off, and it’s why our paints are so vibrant. More on that in a minute.
Supplies:
- dried out markers
- water
- glass jars with lids (large baby food jars or small mason jars are great)
and if you’re putting in the extra effort:
- small bowl
- fork
- scissors or pliers
How to Make Homemade Liquid Watercolours:
First, your kids need to test all of the markers to see which ones are getting low on ink. We use this opportunity to do this fun little art activity.
Then we set aside the good ones and sorted the dry markers into groups of similar colours. We ended up with 6 piles:
- red/pink/burgundy
- orange/yellow/peach
- green/teal
- blue/turqoise
- purple/lavendar
- brown/black/grey
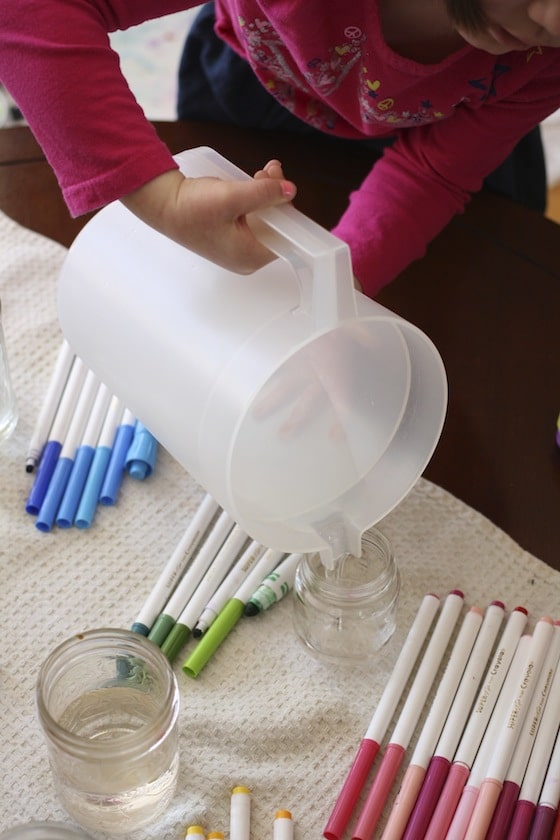
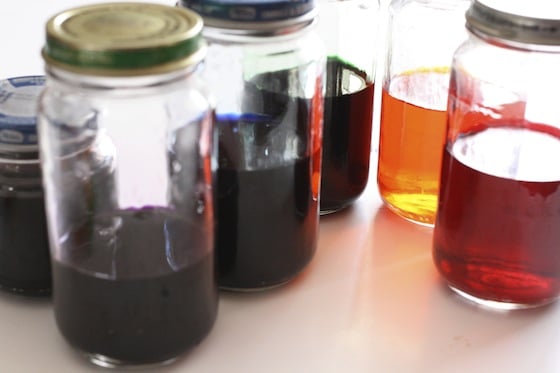
I set out six glass jars, and the four year old poured a bit of water into each jar.
Next, the hooligans placed the markers, tips down, into the water.
Immediately, colour started to leach out into the water.
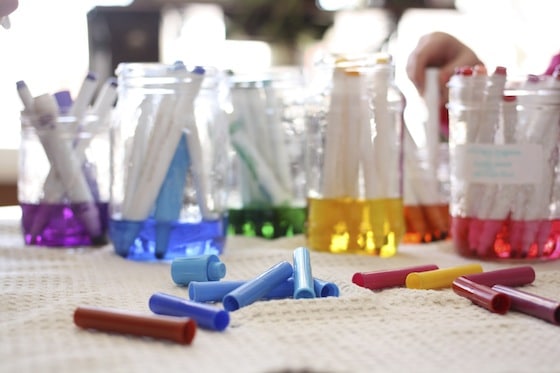
We shook and stirred our jars a bit to observe the changes in the water, and then I set the jars on a window sill, and we left them for a full week.
What if some of the water evaporates?
It will happen. Don’t sweat it! Some water will evaporate, but your pigment won’t.
Your colours will simply become more concentrated, and that’s a good thing.
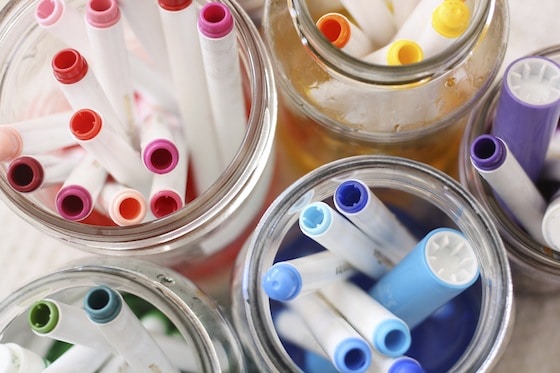
Our water became so dark as the days passed. Turns out there was quite a lot of ink left in those markers after all!
At this point, if you want, you can call it a day, and use your paint as is. This is where the extra effort comes in if you want to get eve more ink out of the markers.
To make our watercolours even more intense:
This next bit can get a little messy, so place everything in the sink, and work from there, or, if you’re working on a countertop or table, place everything on an old towel.
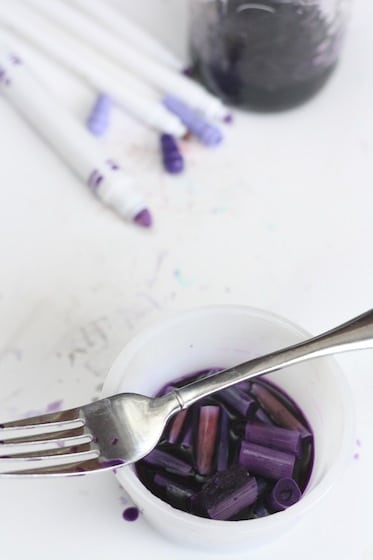
With a pair of pliers, I pulled the ends off the markers and removed the coloured inserts. Some of the inserts slipped out easily when I tipped the marker upside down, but others weren’t so co-operative, so I used the pliers to crack the plastic casing, and tug the insert out.
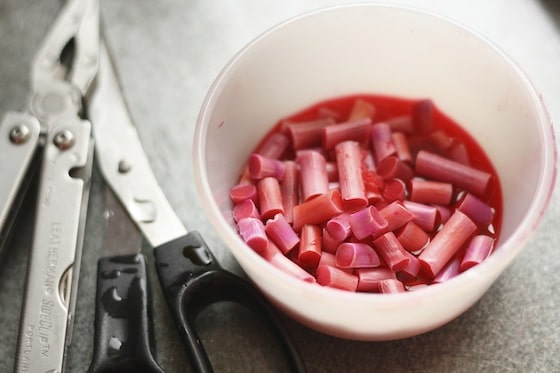
Then I snipped up the sponge inserts, and put them in a bowl with a bit of water.
With a fork, I squished the insert pieces until I had extracted all the colour I could, and I poured it into the matching jar.
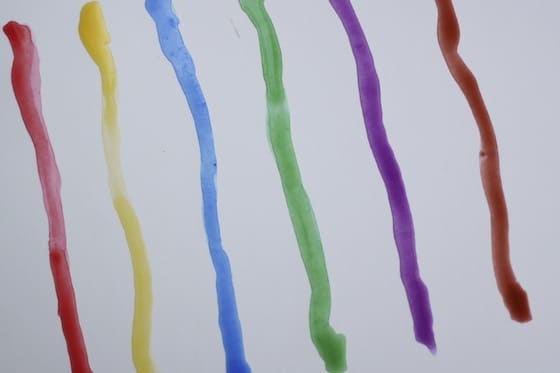
This was the result of my efforts:
The liquid paint colours are so intense that I have to hold some of them up to the light to tell them apart.
How to use your liquid watercolor paints:
You can use your paints full-strength or you can pour a small amount into an ice cube tray dilute with a few drops of water.
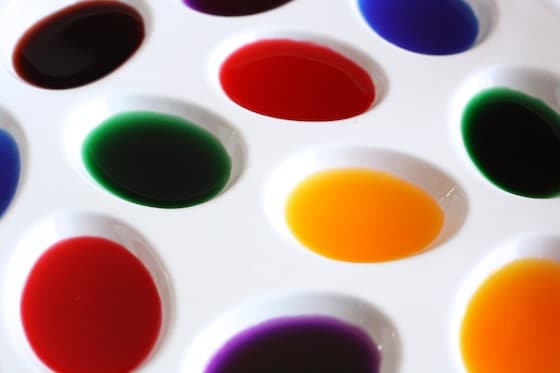
The ones you see below have been diluted.
Preserving your leftover paint:
If, at the end of their painting session, you kids have paint left in the tray DON’T throw it out! Leave the tray out in the open, and let the liquid evaporate. The pigment will dry in the bottom of the tray. When you’re ready to paint again, simply add a few drops of water, and stir to re-constitute your paint!
Storing your homemade liquid watercolour paints:
Store your homemade liquid watercolours in air tight containers. I store ours in baby food jars with the lids screwed on securely.
And there you have it. Gorgeous, homemade liquid watercolours for all of your creative art!
And they didn’t cost you a dime.
Check out some of the projects we’ve done with liquid watercolour paints here, here, here and here.
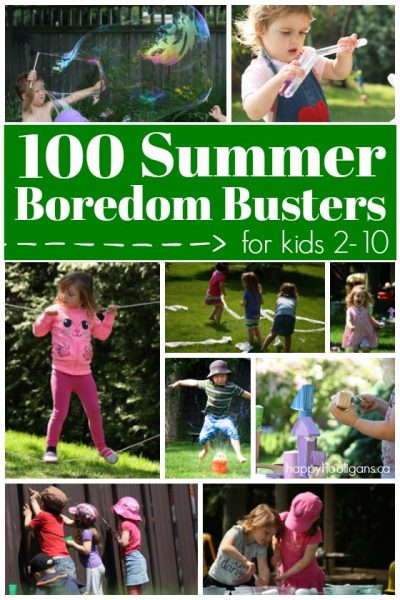
Boredom Busters for Kids!
Print off our checklist of 100 Fun Things for Kids to Do at Home. Stick it on your fridge, and they’ll never be bored again!
More Homemade Paint Recipes:
Follow the Hooligans on Facebook

Jackie is a mom, wife, home daycare provider, and the creative spirit behind Happy Hooligans. She specializes in kids’ crafts and activities, easy recipes, and parenting. She began blogging in 2011, and today, Happy Hooligans inspires more than 2 million parents, caregivers and Early Years Professionals all over the globe.


laughingkidslearn
You are so clever Jackie! Great post! 😀
Sue Agnew
What a great idea, excited to find old pens & have a go ! Great money saving new idea to try at Topcliffe Playgroup – THANK YOU & keep those ideas coming x
Kristin
Can’t wait to give this a try, thanks so much for all your hard work posting and sharing! You are so inspiring 🙂
Marilyn Kok
You are a genius. Recycle, reuse experiment, awesome. Congratulations smart lady.. ?? It.
Lauren
I love the extra step! We’ve made watercolors with the markers, but they weren’t as bright as I’d like. We’ll be trying this soon as we have a ton of dried out markers!
Rita Neve
Jackie I have been doing this all school year. Yesterday we added an off-brand kool aid packet in the appropriate color to each jar of paint. We got more vivid colors and scent.
happyhooligans
The koolaid is a great idea, Rita! That would smell so good!
Ginny
Love it!
childcentralstation
We’ve been doing this for years too :). I even recycle the caps and the body of the markers! I started out using just the markers dipped in the water, now I pull them apart immediately and add the insides to our jars. We seem to have a continuous supply! It also dyes wood beautifully :).
Hannah Johansson
Wow wow wow! The kid in me is super excited! lol! I’m definitely going to try this out for the super kids at my home day care. They will be so excited to do this technique as they love colors!
Dizzy
fantastic idea, what a great way to make use of the pens that would otherwise get thrown away. Might be a good way to show colour mixing by putting red and blue pens together to get purple etc.
winegumsx
This is fantastic! We’ve tried it before but gave up as the colours were so weak, never thought to leave them in so long! Will definitely be trying again now 🙂 x
Vicky @ Mess For Less
You are a genius! Seriously, Jackie this is awesome and I am probably way more excited about it than one should be – LOL! I have not wanted to splurge on liquid water colors but this is a great alternative. Thank you!
Kate
I love this, as I’ve been wanting to buy a full set of liquid watercolors but holding off because of the price. Will definitely try this first!
Let kids be kids
Great ideas. I love the look of that paint 🙂
Sara
That’s a clever idea! Now to go dig out the old markers we have in storage. Thank you!
Anna m
This is great! We have so many left over markers, I am going to make time to try this the colours look so pretty 🙂
Erica Loop
I love this! Such a simple idea, but so creative. I spent years teaching art in a museum’s children’s studio. We threw out dried up markers all the time (with 100s of kids using them, the caps were often left off). We could have been reusing them for water colors instead of tossing them.
Heather
I did this a fee years ago. Unfortunately my paint started to get moldy stored in the jars. I ended up freezing the leftovers in ice cube trays so I didn’t have to throw it out.
happyhooligans
I wonder if there was some food residue in the jars, Heather? The only way I could see mould developing is if there were some bacteria introduced to either the jars or the paints themselves. Strange!
Gude @HodgePodgeCraft
Wow, this is so helpful! Thanks for sharing 🙂
Angie
You can also freeze the leftovers and pop them back in their coordinating color jar 🙂
Khepri
I’m way late with this comment, but this makes me think of “popsicle paints.” You could freeze them in a plastic popsicle mold and then paint with the “popsicle.” (So long as the child painting knew the score.)
happyhooligans
We LOVE painting with coloured ice!
Rebecca
I did this but kept the insert whole. Whe I was done.soaking.I dripped water slowly through one end while holding it my jar. I tell you those inserts were white. I got every last bit of color and my paint is very vivid! Thank you for sharing your method!
Teressa
I wish I’d have seen this last week…we just cleaned out all our markers! I’m considering going out to the dumpster to reclaim them for this project. But perhaps I can wait till more markers “dry up” in a few months or so. 🙂 Thank you!
caitlinshappyheart
This is so cool! Hubby won’t be impressed that I’m keeping yet another broken thing though! He really doesn’t get recycling for play. (I have cried before when he threw out a large pile of shoe boxes!)
Margie Turner
Wow I could have used this 50 years ago when I had 6 wee kids, but I don’t remember having markers then, it’s a lovely idea and I’m passing it on to our grandkids and to our Sunday School teachers too.
d'Arci
GORGEOUS COLORS!! ;:^D
Trish
This is a great idea to pull even more fun out of markers. I especially like how you say it works even on markers that seem to be out of ink or dried out. This may save some markers that my kids left the top off of.
gayezimhuycke
I saved all the dried out markers in my Preschool class and we just made the vibrant watercolours. I can’t get the boughten ones in Canada, but have wanted them. And now we have them. THey are glorious, I thought they might be less hand stainy than food colouring and indeed they took less time to wear off my skin than usual. The babies and I enjoyed painting with them. We made stunning coffee filter designs with our pipettes. Also we did some tie dye with woven paper. Thanks for all the suggestions.
danielle
I found this to be easier and quicker (great for older childer) to use eyedroppers! Take out the felt ink cartridges and dripper water into the top and it pushes the ink out quickly leaving behind only white felt.
Dana
This same trick can be used to make colored glue. Just buy some cheap white or clear school glue, drop in a marker insert or two, and voila! You’ll have pretty glue to use for decorating or fun projects.
Kevin
Quick question. Has anyone else done this and had the jars start to grow mold in them? I bought mason jars and they were sealed tightly over our spring break. Came back and they were globs of whitish mold in them… I was planning on using them as sprays for quick projects but cannot anymore. Tips?
happyhooligans
I’m sorry I can’t help you there, Kevin. We’ve kept ours in sealed baby food jars for over a year now, and they’ve never developed mold. There would’ve had to have been bacteria introduced from somewhere/something in order for mold to grow I think.
Beth
Hi Kevin,
The same thing happen to me. I used clean plastic containers. Have you figured out how to avoid growing the mold??
Thanks Beth
happyhooligans
How strange. We’ve made it dozens of times, and it doesn’t mold. You’re not covering it to store it, are you? That would prevent the paints from drying out, and would likely lead to mold. You need to leave them completely uncovered, and store in a dry location so any moisture evaporates.
Sandy
Add a couple of drops of vinegar to the water to prevent mold from forming.
Eva Nell Hunter
Our church library is the supply center for our church. We ask teachers and other leaders to return to the library the markers when they no longer work. We remove the top of the markers and using a medicine dropper fill them with several drops of matching liquid water colors. They are then ready for use again. This has saved lots of money and the process works well.
happyhooligans
What a clever idea, Eva! I’ve never thought to add liquid watercolours to them! Thanks for sharing!
Louisa
This is fabulous! I’m soo trying this with my kids. We always seem to have a ton of dried-up lids-left-off markers… :-/
happyhooligans
Yay!!
Louisa
We did it!! My boys LOVED this activity, especially the 6 year old. It was the first thing he’d say every day when he came home from school – “I wonder how our watercolours are doing!”- and we had a big countdown to the day they’d be ready!! Such a lovely idea and nice and eco-friendly too. I hate waste, so will be doing this for years to come, I’m sure. Thank you so much. I’m sharing your post on FB.
KD
Does it matter whether the markers are washable or not?
happyhooligans
Yes, you want to use water-based markers for this, KD. Water-based are usually washable, as opposed to oil or alcohol-based markers.
Cindy
Thank you so much for sharing. We have a tight budget and so ideas like this are really helpful!
happyhooligans
I’m glad you enjoyed this one, Cindy! It’s a money-saver for sure!
Saraswati Mantra
It really does work. We combined some to make “new” colors.
Joyce
I have been waiting to try this for a long time ! I am a retired teacher and now working at a home for handicapped adults and they like using water colors, but water colors are rather expensive. So when school ended this year I asked my teacher friends who were still teaching instead of throwing out the dried up markers to save them for me. This batch I used 300 assorted markers and got anywhere from a half pint to a pint of each color. I did pink, red, orange, purple, green, yellow, blue, brown, black. I have another set to do and figure I just might as well put the pink and the red together since there is not that much difference. I was astounded at how much more color came out when I removed the inserts and squeezed. Thanks for such a great idea !!!
happyhooligans
Wow! That’s fantastic, Joyce! Good thinking, asking your teacher friends for their spent markers! I’m so glad my post inspired you to make your own paint! I hope your patients enjoy them!
A
I made these myself a few months ago and went the extra mile. Instead of just taking the cap off the markers and sticking it in the water, I used pliers to open markers to collect the ink cartridge out of the barrel and remove the tip. I put each in bags and sorted them by color. When I pulled apart all my markers, I put the cartridges and tips into solo cups with some water in them. I tried to put in only enough water to cover tips and cartridges so the colors would be more concentrated. I found out through experimentation that you can cut the plastic casing off the cartridge and if you wet the cloth inside with a stream of water, it could completely drain the color off and make the cloth white! I think it only works on ones that were from crayola markers, but you’ll still get some color out if you do that. A similar thing sometimes happens to the tips. What I do is carefully put a cup under the faucet to collect the water and quickly turn the water on and off while holding the tip/cartridge over the cup. Even if they don’t turn white, you can still get color from them by putting them in the cup with the others. I did that for all of them, even when they turned white. I left them to soak for at least a week. To store them, I put them into tiny water battles and label the cap and bottle with the color I have in there. If the color is too light, I put it outside so they evaporate. Since they soaked in a solo cup and the mouth of the water bottle is small, I use a funnel to get it all in. The colors are beautiful!
I also used my liquid watercolors when making play dough. Since the recipe calls for water and food coloring, I decided to see what would happen if I used my liquid water colors instead. The result turned out pretty good, however you need to be careful with how much liquid water color to put in. I used some that weren’t very concentrated and ended up with a lot of water in and I had to add more and more flour and salt and everything just to keep it from being watery goop. I made orange, green, purple, and blue. The orange came out great and I still have it (it’s been like six months as of now and still soft and mold able). The blue was way too watery and goopy and grew mold. The purple and green were a little too wet. I ended up throwing away all of them except the orange. It was a fun experiment and I cant’ wait to make more liquid watercolors.
Katie
How long did it take for the watercolors to dry on the paper? I’m thinking about using these in spray bottles on canvas at a birthday party and would like for everything to be dry after about an hour. Is that possible?
happyhooligans
If you set them in the sun, they’ll dry in that amount of time. They’re watercolour paints, so they’re going to take the same amount of time to dry as it would if you painted the paper with a brush dipped in water.
Denise
Thank you so much for this great idea! Have been using to make watercolors for my preschool class and they turn out beautiful (and no expense!)
Jackie Currie
You’re welcome, Denise! I’m so glad you love your paints!
Celeste Clevenger
Such a great idea! Can’t wait to try it. The part of the post was missing about how to store the paints. Should they be stored in sealed jars?
Jackie Currie
Thanks for the heads up, Celest. I had the heading in the post for how to store them, but somehow the sentence below was edited out. I’ve added it back in. Yes, I store mine in lids with jars. I use baby food jars.
Celeste Clevenger
Hi Jackie, I’m finally getting a chance to do this. Amazing how much color comes out of these dried up markers. I noticed in one of the comments you mention not to seal the jars to prevent mold, so I was wondering if I have mine in glass mason jars should I store them with their lids? I’m thinking from the edit you made, yes, but thought I’d check.
Celeste Clevenger
Jackie thank you for emailing me and letting me know keeping the watercolor paints in sealed, clean jars worked best. My story hour group at the library will be painting with vibrant red, yellow and green watercolor pictures of apples. tomorrow.
Momapennington
Awesome idea next time instead of soaking the markers pull the tips place in tiny container then take the ink hold it up and using a dropper or syringe place one drop at a time on to the top u can watch it bleed all the ink completely by the time u finish the tips can be removed from the container and i let the small container dry to save a little for just in case
R
Another idea… We use leftover Easter egg dye for water color painting.